
Understand the different task response types and how to utilise them.
✏️ Short Answer
What it is: A single-line text field for short responses.
Best for: Company name, contact details, short messages.
Tip: Use the “Character Limit” field to control response length.
Enter a number in the “Character Limit” field to set a limited character count.
✏️ Short Answer (Rows)
What it is: A list-style input where exhibitors can add multiple short answers within one task.
Best for: Social handles, addresses, quick bullet responses.
Options:
- Set a max number of rows
- Allow exhibitors to add more rows if needed
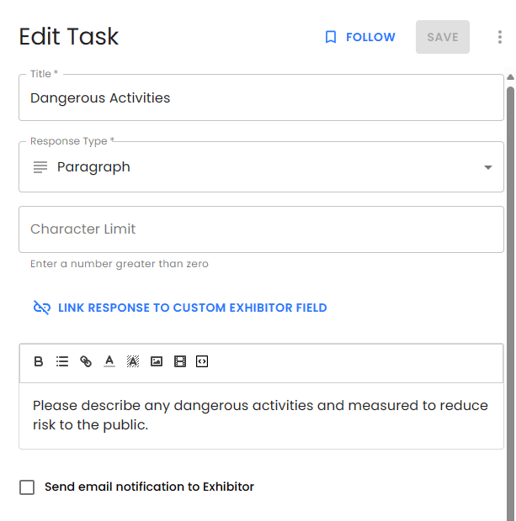
📝 Paragraph
What it is: A larger text field for detailed responses.
Best for: Company descriptions, method statements, special requests.
Tip: Use a character limit if needed.
🔘 Multiple Choice
What it is: Exhibitor selects one answer from a predefined list.
Best for: Stand type selections, yes/no answers, confirmation statements (eg I have ordered my stand furniture/I do not require furniture)
Features:
- Add options and sub-options
- Link to conditional tasks to trigger follow-ups

✅ Checkboxes
What it is: Exhibitor can select multiple options.
Best for: Services required (electric, AV, catering), product categories.
Features:
- Set max number of selectable options
- Link each option to conditional tasks

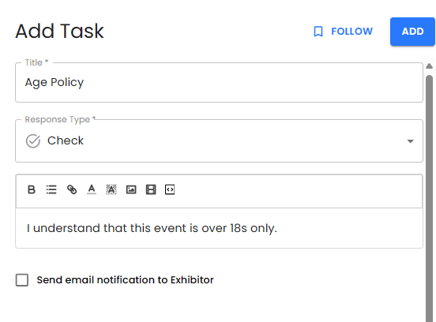
☑️ Check
What it is: A single checkbox for yes/no or true/false confirmation.
Best for: Acknowledging terms, confirming document reads, policy acceptance.
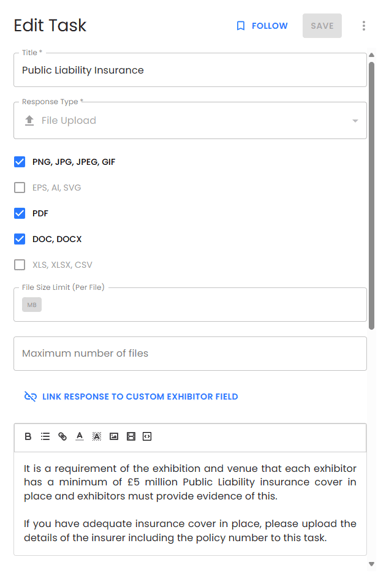
📁 File Upload
What it is: Allows exhibitors to submit files (PDFs, images, powerpoints etc.).
Best for: Insurance docs, artwork, forms, build plans.
Options:
- Restrict by file type
- Set file size limits and max number of files
Reporting: - All files can be downloaded in a ZIP folder
- Auto-sorted by exhibitor name and stand numbe
📊 Grid
What it is: A table format where exhibitors complete rows and columns.
Best for: Multi-field inputs like staff lists, product specs, logistics planning.
Customisation:
- Define row/column headers
- Choose input type (text/dropdown) per cell
- Mark fields as optional or required
- To learn more about creating a grid, click here.

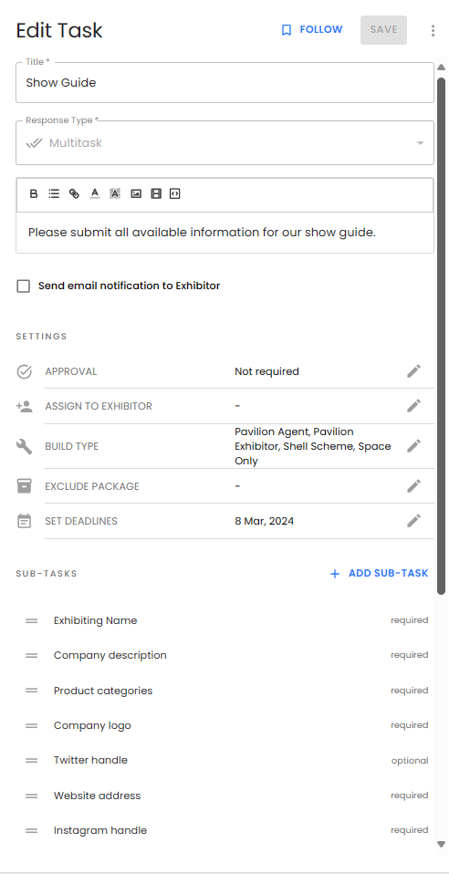
🧩 Multitask
The Multitask option lets exhibitors complete several tasks (or form fields) within a single main Task, allowing you to create complex forms with multiple sub-tasks.
To set up a Multitask form:
-
Add Sub-Tasks: Click the +Add Sub-Task button to add multiple sub-tasks within the main Task.
-
Configure Sub-Task Fields:
- In the pop-up window, fill out the fields for each sub-task, similar to creating a main task.
- You’ll see fields for Title, Response Type, and Notes:
- Title: Enter a clear label for the sub-task (e.g., “Company Name” or “Contact Email”).
- Response Type: Choose the response type (e.g., text, dropdown, checkbox) to determine how exhibitors can answer this sub-task.
- Notes: Add any additional information or instructions for the exhibitor, if needed.
-
Set Required Answers:
- Use the Sub-Task Answer Required toggle to specify if an answer is required. Turn this on if the exhibitor must complete this field to submit the task.
-
Save the Sub-Task:
- Click Submit to add the sub-task to your main Task.
Repeat these steps to add as many sub-tasks as needed. Each sub-task will function as a form field within the main Task.
🔀 Conditional Tasks
Conditional tasks allow you to create customized task lists for exhibitors based on their responses to 'Multiple Choice' or 'Checkbox' questions. When a conditional task is linked to a specific response option, it will automatically be added to the exhibitor’s task list if they select that option. This ensures exhibitors receive relevant tasks based on their unique requirements.
What it is: A way to trigger follow-up tasks based on an exhibitor's answer.
Works with: Multiple Choice and Checkbox response types.
Steps to Add a Conditional Task to an Option:
-
Select the Response Option: Navigate to the Multiple Choice or Checkbox option where you want to add a conditional task.
-
Assign a Conditional Task: Click the icon that appears to the right of the response option (this looks like a calculator icon).

-
Choose Relevant Tasks: In the pop-up window, check the boxes beside any tasks you want to add to this response option. These tasks will only appear for exhibitors who select this specific response.
-
Save the Settings: Once you’ve selected all relevant tasks, click “Submit” to save. The conditional tasks are now assigned and will automatically be added to exhibitors' task lists when they choose that option.
- To add a conditional task to an option, click submit.

When you link a 'parent' task to a conditional 'child' task, certain assignment settings -such as Build Type and Exclude Package configurations -will automatically inherit from the 'parent' task to the 'child' task. This means the child task will follow the same assignment rules as the parent.
To make sure the child task is only triggered when an exhibitor completes the parent task, leave the assignment fields in the child task blank. This way, the system will treat the child task as conditionally dependent on the completion of the parent task, displaying it only for exhibitors who complete the parent task first.